Now that M's stocking is done, I need fun things to fill it up! As our third born the kid needs and wants for nothing, but I thought of a couple crafty things to tuck inside. New (old) bibs and pacifier clips. Tutorials are found below...
Thursday, December 16, 2010
Pacifier Clip Tutorial
These are so easy, you could whip up a bunch really quick.
1. You need one suspender clip, a bit of Velcro, and a length of ribbon. I got this grosgrain ribbon at Hobby Lobby- brown with green dots on one side, plain green on the other. I cut my ribbon to 12 1/2 inches... 2. Tucking in the raw edge, I sewed one end to the suspender clip using a straight stitch. you could use a sewing machine, but I think hand sewing is just as fast if not faster...
 3. I finished off the other end the same way- folding twice to cover up the raw edge...
 4. Sew bits of Velcro onto the ribbon using a straight stitch...
 5. And that's it!
  No more picking up pacifiers off the floor every two seconds. Hooray!
2. Tucking in the raw edge, I sewed one end to the suspender clip using a straight stitch. you could use a sewing machine, but I think hand sewing is just as fast if not faster...3. I finished off the other end the same way- folding twice to cover up the raw edge...4. Sew bits of Velcro onto the ribbon using a straight stitch...5. And that's it! No more picking up pacifiers off the floor every two seconds. Hooray!
Old T-Shirt into Bib Tutorial
I have a big stack of old clothes that are waiting to be turned into something fun. First project- drool bibs for M.
1. I started with this T-shirt... ...and some old pj pants of my son's.
 2. Using a bib I already own, I traced a bib outline onto the T-shirt in disappearing ink. I made it a bit longer to use more of the T-shirt design...
 3. Cut out bib...
 4. I cut out the neck and arm holes to use as edging...
 5. Using a large basting stitch, I sewed the edging onto the right side of the bib with the finished edge facing in...
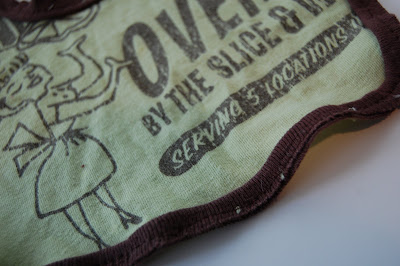 6. I placed bib right side down onto backing fabric, pinned and cut out backing...
 7. Next I sewed the front to the backing leaving a small opening to turn bib right side out.
...and some old pj pants of my son's.2. Using a bib I already own, I traced a bib outline onto the T-shirt in disappearing ink. I made it a bit longer to use more of the T-shirt design...3. Cut out bib...4. I cut out the neck and arm holes to use as edging...5. Using a large basting stitch, I sewed the edging onto the right side of the bib with the finished edge facing in...6. I placed bib right side down onto backing fabric, pinned and cut out backing...7. Next I sewed the front to the backing leaving a small opening to turn bib right side out.8. After turning out, I sewed the opening close with a slip stitch.
9. I sewed small metal snaps on the ends. You could use Velcro dots too... 10. And here's the finished bib! Front...
  ...and back.
 M is on the verge of cutting teeth, so there's lots of drooling to come...
 10. And here's the finished bib! Front... ...and back.M is on the verge of cutting teeth, so there's lots of drooling to come...
Christmas Crayon Roll
I made several of these crayon rolls for the craft fair. Isn't it cute? I want to put this one in my daughter's stocking- I'm just trying to figure out how to convince her it's from Santa and not Mommy! I think it'll be great for coloring in the car during our road trip after Christmas.
I looked at several tutorials online... I like this one from Skip to my Lou. This one from V and Co. is very clever with the hair elastic and button as a closure. As you can see I used a ribbon to tie it up, and I skipped any flannel lining or interfacing. 


 I used this fabric from Hobby Lobby. I LOVE it! Owls plus Christmas-too much fun!
I used this fabric from Hobby Lobby. I LOVE it! Owls plus Christmas-too much fun!Saturday, December 11, 2010
Felt Guitar Christmas Stocking
I finished the Christmas stocking for M last night. Just in time for filling with fun Christmas treats...
 We do not have a fireplace or a mantel, so I'm at a bit of a loss as to where to hang our stockings. I hung them on our IKEA shelving up where the kids can't mess with them. Our stocking hangers are actually picture frames. My next project is to get fun pictures of each of us up there. I only have six hangers so our pets have to share a hook now...


 We do not have a fireplace or a mantel, so I'm at a bit of a loss as to where to hang our stockings. I hung them on our IKEA shelving up where the kids can't mess with them. Our stocking hangers are actually picture frames. My next project is to get fun pictures of each of us up there. I only have six hangers so our pets have to share a hook now...
Craft Bazaar Success
So I'm counting last weeks craft bazaar as a success! It was the first time it was held, so I was a little nervous about the traffic. I had a fair amount of customers and a good response to my items. Actually I was most nervous about leaving my three month old for the whole day, but he did awesome. My husband is a rock star for taking all three kids. Now I am busy listing items that didn't sell on my Etsy shop and doing my own crafting for the holidays!


Friday, December 3, 2010
Craft Bazaar
Crafting madness! I've been sewing and stitching like crazy for weeks now to get ready for a holiday craft bazaar tomorrow. Hoping all goes well! If you live in the Durango area come and see me at the Main Mall from 9-4. I have tons of fun things for little ones!

Monday, November 22, 2010
CARS Birthday Party
This month my son turned five and had his first full blown birthday party! I have always imagined crafty parties full of handmade goodness for my kids, so you'd think I would be disappointed when he requested a Lightning McQueen party. The last thing I wanted was a cookie cutter party with a bunch of plastic, licenced junk. But the funny part is- I love CARS too! I grew up with a dad who is a "car nut" who loves all motor sports, Route 66, Paul Newman, and Steve McQueen. Disney's CARS was tailor made for him, and I can't help but appreciate all the clever stuff they put in that movie. Anyway, it was fun to put my spin on a CARS birthday and my son loved how it all turned out.
Invitations- custom tickets to the big race. I borrowed heavily from an invite I found online, but I can't find the source to post here... Decor- birthday bunting made from checkered flag scrap paper found at Hobby Lobby...
 ...and checkered flag bandannas, also found at Hobby Lobby...
  Cake- I used one of those molded cake pans (also found at Hobby Lobby.) The decorating instructions were very detailed. Thankfully I had all the decorating tips and icing colors at home already, but it took me over three hours to frost this cake. I doubt I will be making this again...
 Party favors- personalized reusable CARS cups (found at Walmart) filled with homemade racing car crayons...
 I got the idea for these crayons from this post at homemade by jill. Aren't they awesome? You just melt down crayons and pour them into chocolate or candy molds...
 She melted crayons on her stove top in tin cans. I wanted to try to use my microwave to melt them down, but after Googling the idea I opted for using a regular oven instead. It sounded much safer. I broke up crayons into metal foil baking cups then put them in a 350 degree oven. They liquefied in minutes, and then I poured them into the mold. I think they turned out super cute!
 Decor- birthday bunting made from checkered flag scrap paper found at Hobby Lobby......and checkered flag bandannas, also found at Hobby Lobby...
  Cake- I used one of those molded cake pans (also found at Hobby Lobby.) The decorating instructions were very detailed. Thankfully I had all the decorating tips and icing colors at home already, but it took me over three hours to frost this cake. I doubt I will be making this again...Party favors- personalized reusable CARS cups (found at Walmart) filled with homemade racing car crayons...
 I got the idea for these crayons from this post at homemade by jill. Aren't they awesome? You just melt down crayons and pour them into chocolate or candy molds...She melted crayons on her stove top in tin cans. I wanted to try to use my microwave to melt them down, but after Googling the idea I opted for using a regular oven instead. It sounded much safer. I broke up crayons into metal foil baking cups then put them in a 350 degree oven. They liquefied in minutes, and then I poured them into the mold. I think they turned out super cute!
Overall I think the party was a success! Now we are anxiously awaiting the premier of CARS 2 coming in June!
Friday, November 5, 2010
Women's Shirt to Toddler Dress
A little revamp on an old shirt I don't wear anymore. I like the way the gathering at the neckline turned out, but overall it looks too baggy. It was fun to sew something without having to iron anything, though!


Weekend Sewing
Last weekend I whipped up these boxy little bags for gifts at MOPS. They seemed like a hit, so I think I'll be making some for my booth at the Christmas craft bazaar coming up.  I have lots of projects in the works for this bazaar. Here's a little taste of my felt Christmas stockings...


I have lots of projects in the works for this bazaar. Here's a little taste of my felt Christmas stockings...
Monday, November 1, 2010
Baby Costume
I didn't have much time to be crafty this year for Halloween, but I did sneak in some homemade goodness for my youngest. Inspired by his middle name, I made him go as Moses. Here he is sporting the Styrofoam "Ten Commandments" and a little grey felt beard that slipped over his pacifier. He was the hit of the evening!

Sunday, October 31, 2010
Little Girl's Apron Set
This was a gift for a birthday party was went to today- a little play apron in a fun cherries print... 
That reverses to a red gingham... Matching pot holder...
 And felt chocolate chip cookies...
 Perfect for a little girl's play kitchen!


That reverses to a red gingham...
 Matching pot holder...
 And felt chocolate chip cookies...
 Perfect for a little girl's play kitchen!
Subscribe to:
Posts (Atom)