We'll be staying in for Valentine's Day- no fancy dinners out for us this year. So I'll try to make something special at home. This heart salad is on the menu.

To make an ordinary salad for Valentine's I added heart shaped Parmesan crisps and croutons. They are both really easy and quick. Here's how I made the cheese crisps:
I like a recipe with one ingredient. Grate about 3/4 of a cup of Parmesan cheese...

Line a cookie sheet with parchment paper or a Silpat. Use a heart shaped cookie cutter to make little mounds of grated cheese...

It should look like this going into the oven. Bake at 400 degrees for 3 to 5 minutes...

And they look like this coming out of the oven...

Let cool and carefully remove with a spatula...

Add them to your salad (or soups, to top a roast, etc.) They are crispy and delicious! I saw the heart shaped croutons years and years ago in a Martha Stewart magazine. This link shows you how to make them, although I ended up making mine slightly different. Instead of baking them I toasted the croutons in a skillet with olive oil and Mrs. Dash garlic pepper. Either way, they are pretty easy.

A special salad for your someone special. I hope my valentines love it!


 Here's how I did it:
 2. Cut into strips about one inch wide.
 3. Fold in half.
 4. Using a pen (or dowel, knitting needle, etc.) roll the paper tightly up to the center fold.
 5. Take the pen out- it should look like this.
 6. Repeat with the other side. The paper will form a heart that looks like this.
 7. Cut a length of thread twice as long as you want your hanging to hang. I strung a small glass bead onto the end to give the whole thing weight. Then thread a sewing needle onto the the thread. Using the needle, pull the thread up through the bottom of the paper heart.
  8. Using a small piece of double sided tape or a photo mounting square, stick the top of the heart together, making sure to catch the thread in the tape.
 It should look like this when you are done.
 9. Follow this the remaining paper hearts, stacking them on top of each other.


 2. Tucking in the raw edge, I sewed one end to the suspender clip using a straight stitch. you could use a sewing machine, but I think hand sewing is just as fast if not faster...
 3. I finished off the other end the same way- folding twice to cover up the raw edge...
 4. Sew bits of Velcro onto the ribbon using a straight stitch...
 5. And that's it!
  No more picking up pacifiers off the floor every two seconds. Hooray!
 ...and some old pj pants of my son's.
 2. Using a bib I already own, I traced a bib outline onto the T-shirt in disappearing ink. I made it a bit longer to use more of the T-shirt design...
 3. Cut out bib...
 4. I cut out the neck and arm holes to use as edging...
 5. Using a large basting stitch, I sewed the edging onto the right side of the bib with the finished edge facing in...
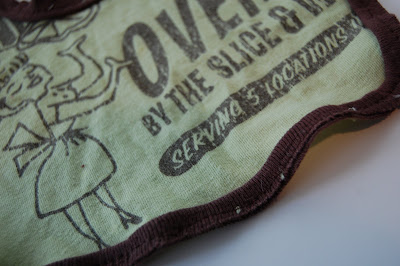 6. I placed bib right side down onto backing fabric, pinned and cut out backing...
 7. Next I sewed the front to the backing leaving a small opening to turn bib right side out.
 ...and back.
 M is on the verge of cutting teeth, so there's lots of drooling to come...